There are as many opinions about priming and corrosion control as there are people building experimental aircraft. When I belonged to the Van's email group, I did an archive search and typed in the word "Primer". I got some 7,000+ different responses. Everyone has a different opinion ranging from no primer at all to the full treatment of Acid Etch/Alodine/Mil Spec Epoxy Primer. There are several different types of primer to choose from - rattle can self etching, zinc chromate, 2 part Mil-Spec epoxy, etc.
The first question is whether or not to prime at all. The way some people talk you would think that without primer, in a couple of years the plane will turn to a fine powder dust in mid-air and you will fall out of the sky. There are several 10's of thousands of 30 and 40 year old Cessnas flying right now that have no primer at all inside the interior surfaces of the wings and fuselage. Some have corrosion, but most of them don't.
I finally concluded that a couple of factors come into play on deciding whether or not to prime and to what degree. First, what type of aluminum is used? If the aluminum is Alclad (a very thin coating of pure aluminum) it already has some corrosion resistance built in - provided you don't scratch it deep enough to get through the Alclad layer.
Second, where will the plane be primarily located? If you plan on keeping the plane in a dry climate like Arizona and the aluminum is Alclad, priming may not be necessary for you. If you live right on the coast and will be flying in sea air all of time, I would go with the full treatment.
Third, how long do you plan on keeping and flying the plane? Really, lets face it - will you be still flying this plane in 25 or 30 years? Will they still be selling gasoline by then? Who knows, it may be outlawed and obsolete by then Your airplane may be in a museum with your grandkids saying "You really used to get in that thing and fly grandpa?"
Fourth, will you ever sell the airplane? If you plan on selling it someday, primer on the interior surfaces may increase the resale value and desirability.
In my case, I live on the Mississippi Gulf coast and do a lot of flying to Florida. At the time of this writing, I am 46 years old and healthy (although a little overweight) so I plan on flying for at least another 30 years (if it stays legal that long). I may or may not sell the plane at some point in the future. Given all of these factors, I have decided to Alodine treat and 2 part Epoxy Prime my aluminum parts. The steel parts will all be sand blasted and Epoxy primed.
Here is my process for all of the aluminum, interior surfaces and aluminum parts:
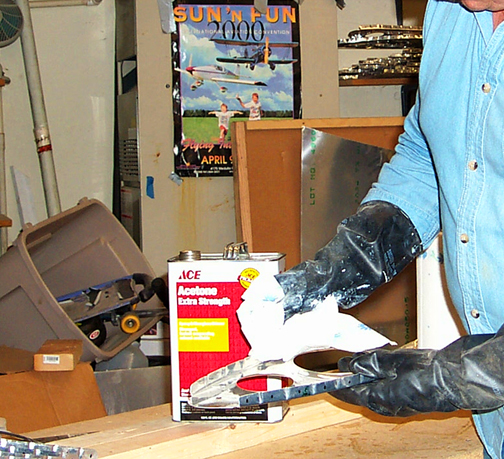
To start with, I went over all of the parts with Acetone and paper towels to clean off all of the ink, wax and other foreign stuff:
I used gloves to protect my hands and to prevent the oils from my hands from re-contaminating the aluminum.
Next, the aluminum parts received a good cleaning in Dawn Dish Soap. Dawn will remove all oils and dirt from the parts. I used a scotchbright pad and lots of elbow grease to completely clean and scuff the parts. This took several hours for the nose ribs and I was very tired at the end:
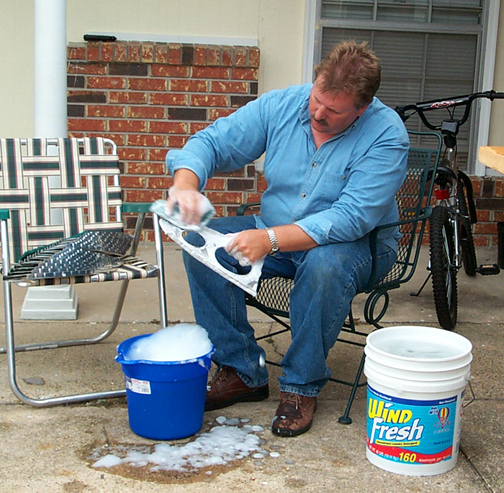
Never - ever use any type of steel wool or SOS pads to clean aluminum. The steel wool will leave steel particles embedded in the aluminum and will start the corrosion process because of dissimilar metals. The Scotchbright pads are non-metal and do a good job. I used Dawn Dish soap with warm water in one bucket and clean rinse water in the other one. You can tell if the aluminum parts are clean and oil free by watching how the rinse water runs off. If the water runs off in sheets, its clean. If you get droplets (like the beads of water on the hood of your car when it has a nice coat of wax and gets wet) and spotting, its not clean enough. You either have wax, or oils, or some other contaminants. Start over and do it again.
Once the cleaning was done, the ribs received an acid etch. This is simply some watered down Phosphoric acid sprayed on and allowed to soak for about 10 to 15 minutes, then thoroughly rinsed off. The acid chemically etches the surface of the aluminum and helps the primer adhere better.
After acid etching, the ribs got the Alodine process. Alodine is a solution that chemically converts the surface of the aluminum and creates a corrosion resistant layer. Its kind of a dark yellow color and quite pungent. You can either spray or brush it on, or dip your parts in the solution. I chose to spray it on with a spray bottle and then spread it around with a fine bristle brush to assure an even coating. Here is before and after pictures of some nose ribs (note: the alodine is still wet on the second picture):
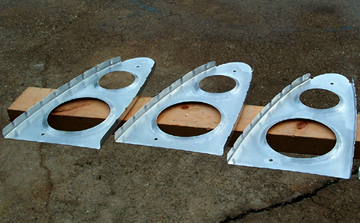
The Alodine is allowed to soak for about 5 to 10 minutes (do not let it dry, re-spray if necessary to keep wet) and then was rinsed off thoroughly with clean water. Do not handle the parts with your bare hands. You may get oil from your hands on the parts. When done correctly, the aluminum will have a golden, yellowish color to it.
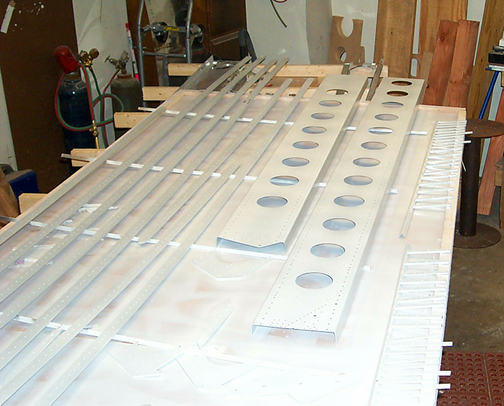
Here is a picture of the Right Main Wing Spar parts drying in the sun after Alodine treatment:
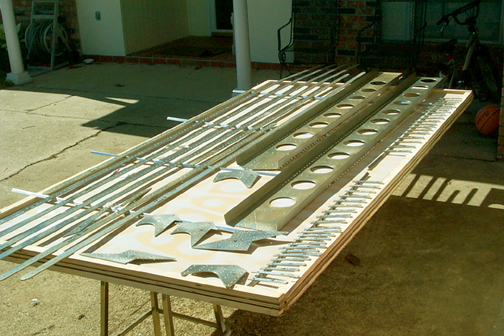
The parts were then allowed to air dry completely overnight. It is important to not rush this drying process. If your parts are still wet when you prime them, you will trap moisture between the primer and the part. Also, do not wipe the part dry. Just let it air dry. The parts will take on a kind of yellowish hue after the Alodine process. This is the protective coating, do not scratch it or rub it off.
While building my RV-6A, I discovered what is, in my humble opinion, the best 2 stage, corrosion inhibiting Epoxy Primer on the market. Its made by Poly Fiber and its called EP420.
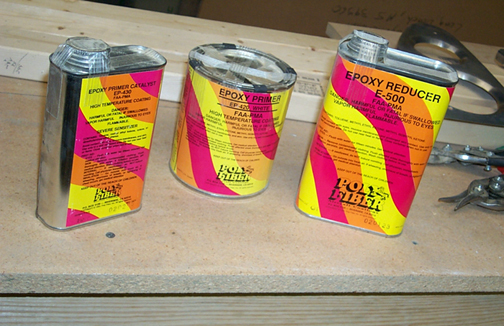
It comes in green or white. This stuff is corrosion resistant and practically bullet-proof. I liked it so much that I used it as the cockpit interior paint for my RV. I once slipped with a drill and the drill bit actually slid across a surface that had been primed with this stuff. Believe it or not, it didn't leave a scratch!
My big mistake on the RV with this stuff is putting it on too thick. I shot several heavy coats on every part of the aircraft interior surfaces. I actually used a gallon kit (2 1/2 gallons net) on just the interior of the wings alone. My plane weighed in too heavy at the end and I attribute a lot of that to this heavy application of primer.
I later found out from a Poly Fiber rep that what is actually needed is only a couple of very thin coats. In fact it should be a little transparent when completed. If you have a felt mark on the piece before priming, you should still be able to read the mark after priming or its too thick (and heavy).
I used a cheap Harbor freight HLVP (High Volume Low Pressure) gun to spray on the primer.
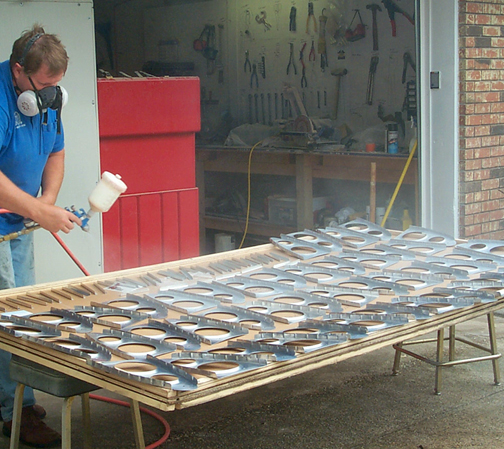
In the picture above I'm actually too far from the ribs that I'm priming. If done correctly, you won't have nearly all of the overspray I was creating in the above photo and less waste as well. During spraying, I concentrated on getting a good coat on the mating surfaces mostly. Any place where the parts will come together (stiffener to rib area, rib flanges, etc.) is more susceptible to corrosion than a part that is simply standing in mid air with nothing touching it.
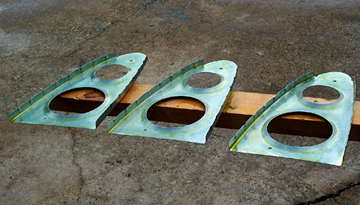
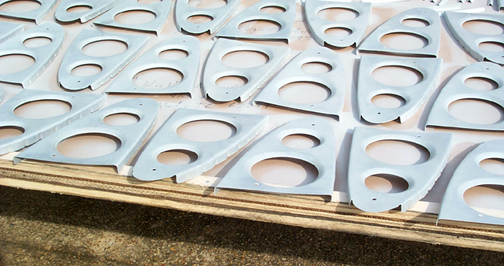
Here is a picture of the nose ribs all primed up. You can see that it is fairly transparent but still very well protected.
The stiffeners also received a coat of primer, mostly on the side that will touch the rib.
Here is a picture of the Wing Spar parts after priming. This is just two very thin coats but adequate coverage is there. I can still read the parts markings through the primer:
That's it for priming. Its up to each individual builder on whether or not to prime and what primer methods to use.
One more closing thought. In the picture log of the prototype wing being built by the designer Bob Barrows, I see no evidence of primer on the ribs or inside of the skins. The spars and all steel parts do appear to be primed however. I'll allow you to draw you own conclusions from that. ;>)
